Yes, you can wire a switch with 12/2 wires. 12/2 wires can carry 20 amps, which is more than enough to accommodate a lighting circuit.
If you still have questions, you will find the answers below:
1). Is 12/2 The Best Wire Size for The Switch?
No, it isn’t. The best wire size is 14/2. Contractors use this gauge for 15A circuits, which you find in most homes. 14/2 can transmit 15 amps, which is sufficient for switches. The wire size stands out because of the following:
- 14/2 is cheaper than 12/2. This is a good thing if you prefer copper, which is expensive. If you’re determined to use copper instead of aluminum, you can save money by prioritizing a lower gauge.
- 14/2 is easier to install. 12/2 is thicker and, therefore, stiffer. As such, wiring a circuit with 12/2 is more challenging.
- You can fit more 14/2 wires in a conduit.
2). Why Use 12/2?
Even though 14/2 is cheaper and easier to install, many people flock to 12/2 for their switches because of the wire’s versatility:
- 12/2 can accommodate heavy-duty appliances. You don’t have to limit the wire to light switches. It will run the devices you connect to the outlets.
- You can connect various types of switches and lights without overloading the wires.
- 12/2 cables can survive exterior conditions such as extreme heat and burial that would typically overwhelm 14/2 lines.
- You can extend the load in the future without replacing the wiring.
3). Does The Circuit Size Matter?
Ultimately, the circuit size will determine the wire size. Most homes use 15A or 20A circuits. 15A circuits use 14AWG while 20A circuits work with 12AWG. You should select the circuit size that fits the load.
If you need 15 amps to run the lights, use 14/2. If the load requires more than 15 amps, use 12/2.
But what happens when you connect 12/2 wires to a 15A circuit?
Nothing will happen. You can wire a switch with 12/2 lines on a 15A circuit. Contractors use thicker gauges all the time. Problems only arise when you install a smaller gauge. For instance, you can’t wire a switch with 14/2 on a 20A circuit. If someone connects a load that uses more than 15A, the wires will overheat because 14/2 can only withstand 15 amps.
4). Can You Use Both 12/2 and 14/2 While Wiring A Switch?
Mixing gauges is tricky. However, this practice is acceptable. The 14/2AWG wire is the biggest threat. If the switch pulls more than 15 amps, the 12/2 lines will survive because they can handle 20 amps. On the other hand, the 14/2 cables will overheat.
Wiring A Single-Pole Switch With 12/2 Wire
A single-pole switch is a basic switch that turns the lights on and off. Yours may even feature ‘ON’ and ‘OFF’ symbols. Single-pole switches have brass-colored terminals connected to a hot wire. Don’t expect to see a neutral wire connection. The grounding wire runs to the green screw.
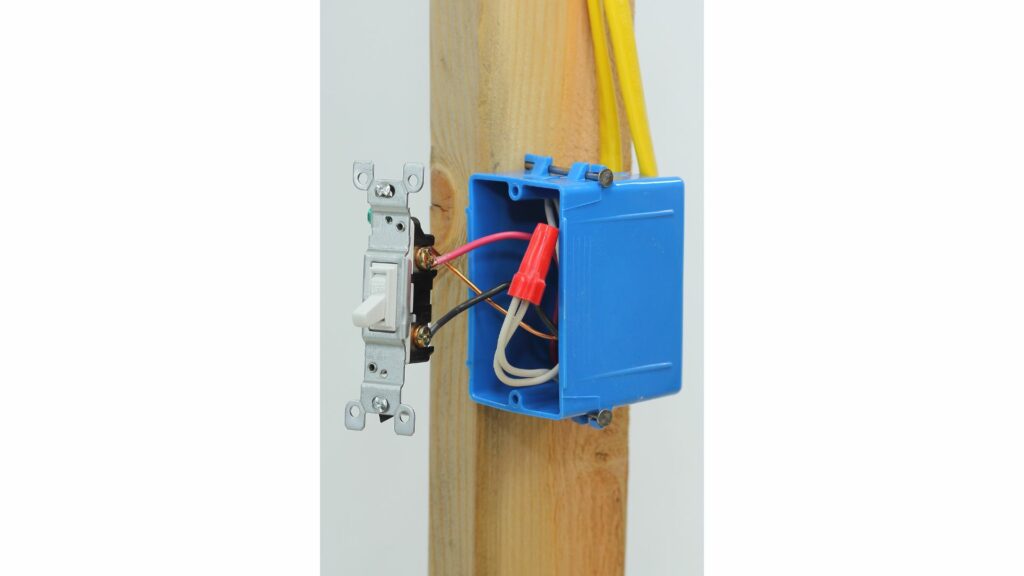
You can wire a single-pole switch with 12/2 lines because they have everything the switch requires. The process involves the following:
- De-energize the circuit to avoid potentially fatal shocks.
- If you’re trying to replace an old switch. Use a tester to confirm that you successfully turned the power off.
- Get the wires and strip ¾ inches of the insulation off the ends.
- Twist the ends into loops. Wrap the green wire around the ground screw. Do the same for the black wires. Loop each live wire around a brass-colored screw.
- Tighten the screws. Make sure each connection is good. You can add electrical tape where necessary.
- Energize the circuit and test the switch. Does it work? Can it turn the light on and off?
If the switch won’t work, consult an electrician. They will determine whether you wired the switch poorly or bought a defective one.
Watch the below video to know more about wiring a single pole switch!
Wiring A Three-Way Switch With 12/2 Wire
Three-way switches allow consumers to control a light from two different locations. For instance, you can turn the light above a staircase on or off from the top and the bottom of the stairs. You can use one of three wiring options to configure a three-way switch:
1). Run the wires from the power source to the first switch box. From there, the wires can continue to the light before terminating at the second switch.
2). Take the wires from the power source to the light fixture. The cables can continue to the first switch and then the second.
3). The wires from the power source can run from one switch to the other before continuing to the light fixture.
As you can see, it is a matter of determining which of the three devices (Switch 1, Switch 2, Light Fixture) the wires from the power source will enter first. You can rearrange the order depending on your needs and preferred configuration.
Electrical101 has diagrams showing some of the setups you will encounter. However, if you’re trying to configure a three-way switch with 12/2 wires, you won’t succeed. Bobvila has a guide showing consumers how to wire their three-way switch.
They mention a 14/2 cable with black, white, and ground wires and a 14/3 cable with black, white, red, and ground lines. The 14/2 cable brings the power from the source to the first switch box.
The 14/3 cable takes that power to the second switch before stopping at the light. A wire with two conductors is insufficient. You need three conductors between the switches. Otherwise, your three-way switch won’t work. If you prefer 12-gauge wiring, you need 12/3. 12/2 won’t do.
Watch this video to know more about wiring three-way switches!
Troubleshooting Common Issues With Switch Wiring
Light switches are similar to outlets. They are not that difficult to troubleshoot. If your switch is misbehaving, use these steps to identify the problem:
1). Check the switch for damage. Listen for buzzing and crackling. You can also touch the switch. Does it feel warm? Some switches are poorly wired. But others are defective. You should replace defective switches.
2). If the switch is free of disturbing signs, turn your attention to the light fixture. In some cases, the bulb is simply burnt out.
3). If the switch won’t work, inspect the breaker. Maybe it tripped, or someone switched it off. Does it have burn marks, cracks, or other signs of wear and tear? Do you hear crackling? Is it warm? Replace defective breakers.
4). Check the wires behind the switch and the light fixtures. Are the connections loose? What about the cables? Are they damaged? Tighten loose connections and replace damaged wires.
Besides taking the measures above in response to dim and flickering lights and concerning symptoms such as crackling in the switch, you should also keep the following in mind:
- Make sure the bulb matches the fixture’s rating. Avoid overlamping. The term refers to a situation where the bulb’s wattage exceeds the fixture’s capacity.
- Don’t leave exposed wires out in the open. Besides covering them with wire nuts and electrical tape, you should hide them inside electrical boxes.
- If you already installed electrical boxes, make sure you cover them.
- Configure your GFCIs carefully. A GFCI connected to your switch or lighting circuit could become a nuisance.
- Avoid backstabbing. Backstabbed connections are not reliable. The wires may fall out.
- De-energize the circuit during installations, replacements, and repairs.
- The wire size should match the circuit size. The circuit size should fit the load.
- If a light starts flickering, don’t be so quick to tamper with the switch. Sometimes, the bulb is simply loose. Tightening it will solve the problem.